Listings
Learn how to create a new NFT listing.
Overview
The Listings page is the first area you'll see after logging into the Gigantik Portal. Here you can create new items and view any previously created listings. Gigantik makes it easy to create new items. You simply upload media from your computer, choose a listing type, and convert your media into a digital asset. Once created, your item will appear on the Listing page in the dashboard and be made available in your Marketplace.
Step 1: Add New Item Details
The first step when creating any listing is entering the minting information. This information is written to the blockchain and includes your digital file, name, description, price, and other metadata associated with your token.

-
From the Gigantik admin, go to Create > Listings.
-
Click the Create New button.
-
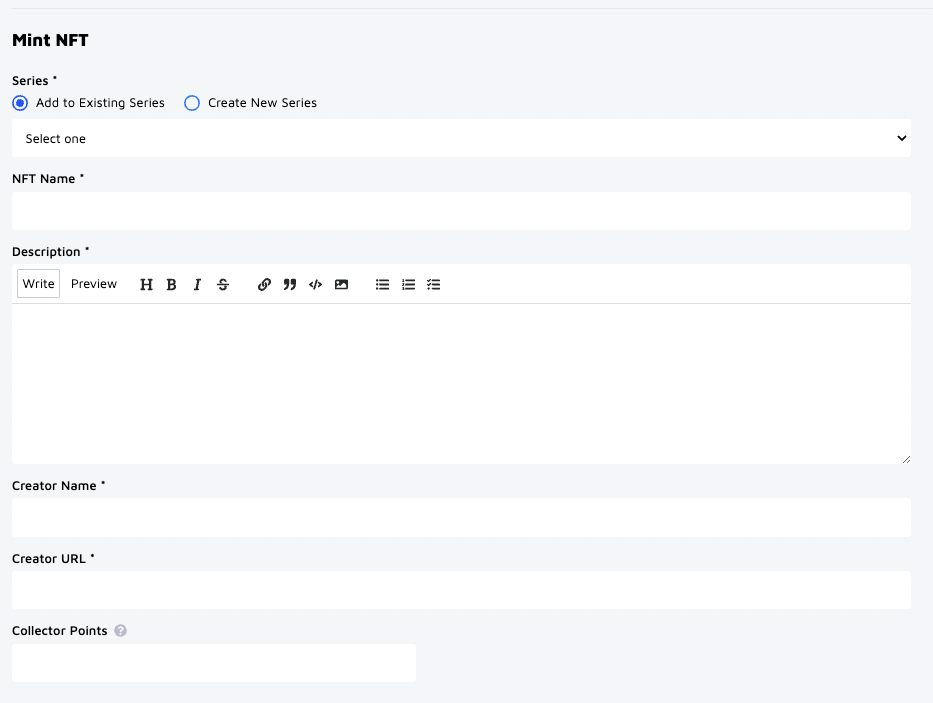
If you’ve already created a Series, choose an existing one from the dropdown list. Otherwise, select Create New Series and enter a Series name and Series Description.
-
Enter a Name for your item and a Description. You can select Preview at any time to see how your description will look on the front end.
WYSIWYG Editor
Anywhere the WYSIWYG Editor is present, we also support Markdown. Learn more here
-
Enter a Creator Name and Creator URL in the applicable fields.
-
Optional: Collector Points allow your users to collect points when they purchase NFTs. In the Collector Points field, enter a number to assign a point value to the NFT. You can also use the up/down arrows in the field to increase or decrease the point value.
FLOW Limitation
FLOW does not currently support non-ASCII characters in either the NFT Name or Description.
If either location contains one of these characters, you'll receive an error and must replace it before minting.
This site can be used to check for non-ASCII characters.
Step 2: Upload an image, video, or 3D Model

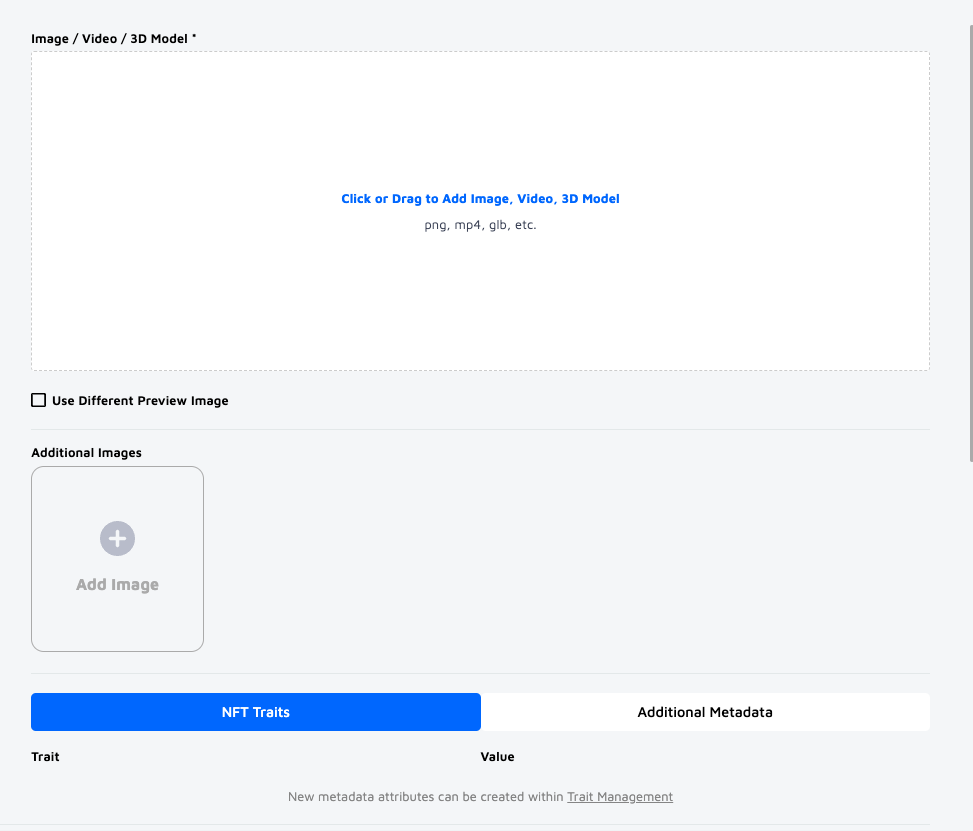
- Click into the Image / Video / 3D Model box to upload a supported file type from your computer. You can also add a file by dragging and dropping it into the area.
- Optional: Select the Use Different Preview Image. checkbox if you want to add a different image to display before the listing.
- Optional: From the Additional Images section, you can add additional images to your NFT. Note that any other images you add will appear on the Listings page.
- Optional: To add NFT Traits and Additional Metadata to your listing, click the NFT Traits and Additional Metadata buttons to select from a list of options. Note that you should set up Traits and Metadata Trait Management before creating a new listing.
Traits and Metadata Attributes
You can only create new traits at the series level and not on each individual listing. However, once you create a set of traits and values for a series, you can then assign those traits to individual listings. See the Traits and Metadata guide for more information.
Adding a Different Preview Image
When you add a different preview image, it appears on the listing card on the homepage (if featured) and on marketplaces. The main image will show up on the listing detail page. Maybe a screenshot will make it more clear.
Step 3: Choose your Listing Type
To list your NFT, you'll choose one of the following Listing types and complete your listing details:
Updated 10 months ago
