Gated Drops
Learn how to restrict access to NFT drops

Overview
Gated Drops enable you to create additional value for your community of collectors. When collectors hold one or more NFTs, you can reward them with exclusive access to purchase, place a bid, or redeem certain NFTs.
Gated Drops User Flow
To understand how Gated Drops work from the user's perspective, visit our Gated Drops User Flow page.
Before You Start
If you plan on adding more than 1000 required NFTs to your Gated Drop Campaign, the Select All functionality will not be available and you will have to manually select each required NFT. To avoid this, we recommend creating a group for your required NFTs for a quicker selection process.
Step 1: Add the Campaign Details

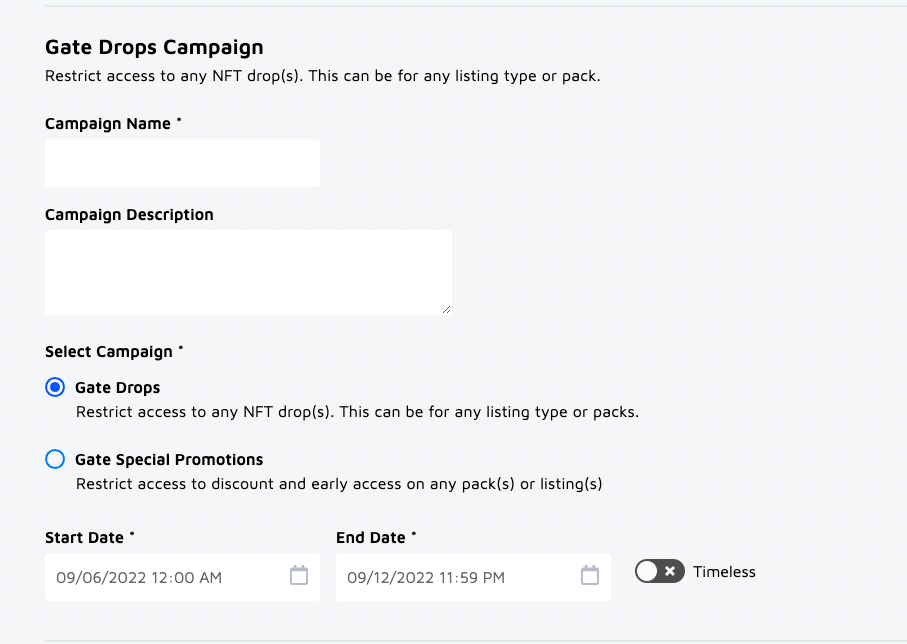
- Go to Utility > Campaigns and click the Create New button.
- Enter a Campaign Name
- Optional: Enter a description for your campaign. This description is for your own reference and collectors will not see the description in the Marketplace.
- In the Select Campaign section, click the Gate Drops radio button.
- Enter the Start Date and End Date for your campaign. If you don’t want to set an End Date, toggle Timeless.
Step 2: Select Gated Drops
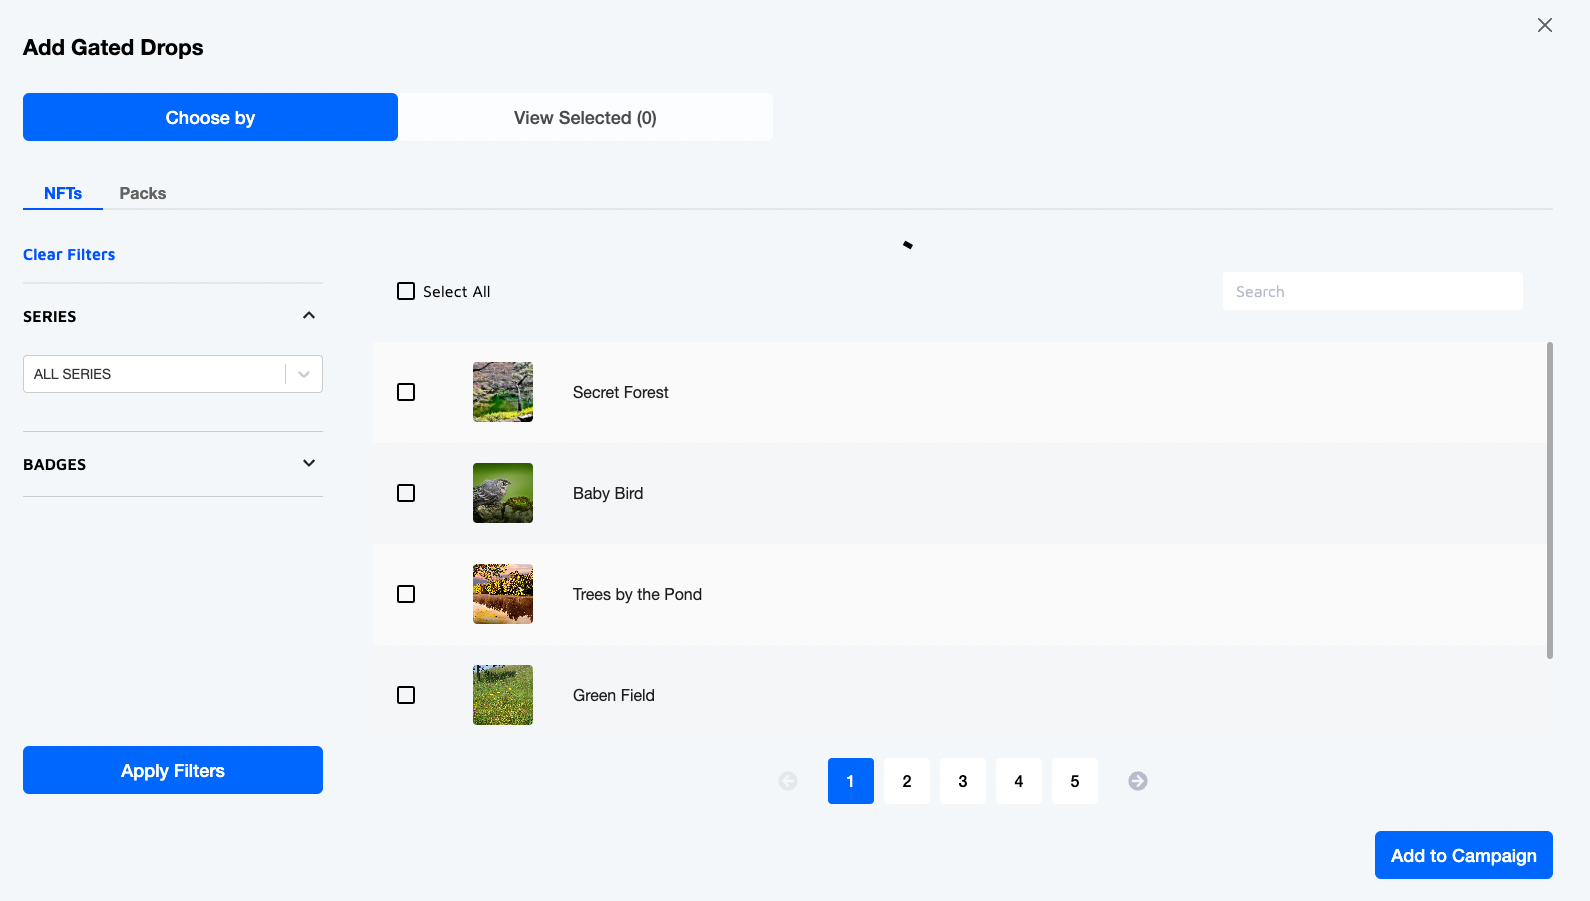
Add the NFT drops that you want to restrict access to.

- Click the Add NFTs button to open the NFT selector.
- Select the NFTs or Packs that you want to add to the campaign.
- If adding NFTs, you can filter by a series, traits, or badges.
- If adding Packs, select from the list of available packs.
- Once you select the NFTs or Packs you want to add, click the Add to Campaign button.
Step 3: Select Required NFTs
Select the NFTs required for collectors to access the selected gated drop(s).
Note
You can only select one type (Listing, Series, or Group) per campaign. If you want to select more than one type, you can create another campaign and run multiple campaigns at once.

- Choose whether you want to add NFTs from Listings, Series, or Groups. Note that you can only select one type per campaign.
- Click the Add [Listing/Series/Groups] button.
- Select the required NFTs you want to add to the campaign.
- Click the Add to Campaign button.
Step 4: Select Access Rules

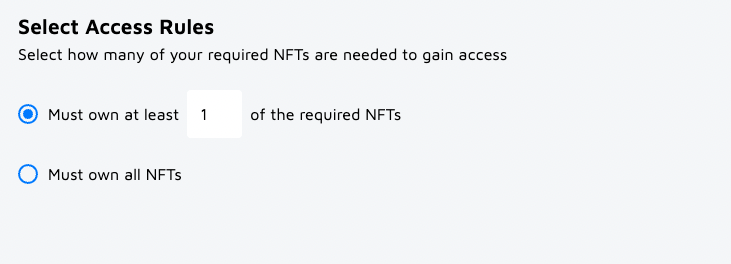
In this final step, you’ll select the number of NFTs required in order to gain access to the gated drop. You can choose from the following options:
- Must own at least (#) listings in the required [type]: This allows you to select a number of listings a collector must own. For example, if 100 listings are required to gain access to a gated drop, you can set the rule that the collector must own at least 20 of the required NFTs. These can be any 20 listings. We recommend this option if there is a large number of NFTs required for access.
- Must own all [type]: Selecting this option requires the collector to own all of the listings to gain access. We recommend this option if there is a limited number of listings required for access.
Step 5: Create your Campaign
Once you’ve determined the rules, it’s time to create your Gated Drops campaign! Click the Create button to bring up a pop-up asking if you’re sure you want to create the campaign. Once you’ve checked that all of your information is accurate, click Create in the pop-up menu.
Editing your Campaign
To edit the details of your campaign, go to Utility > Campaigns and click on the campaign you wish to update. Note that the campaign is only editable until it ends. Once the campaign is over, you can no longer edit it.
Note
Groups cannot be edited or deleted if they are required in one or more campaigns. To make the updates, remove the specific groups from campaigns, update and save it. Once it is done then add it to the campaign.
Updated 10 months ago
