
Experiences - Marketplace
Illustrating the marketplace side of experiences

Overview
Once experiences have been enabled, a navigation bar item labeled Experiences will appear on the marketplace. Additionally, collector's Account page (e.g. "https://mydomain.com/myaccount#experiences") will gain an Experiences tab. Collectors can see any active experiences in either location.
Collectors can discover experiences associated with listings, denoted by a special icon, in two sections of the marketplace. The first location is on the Drops page, while the second one is accessible within their mycollection page, provided they have already purchased a listing that includes an experience.
Experiences in Navigation Bar
Collectors can easily and quickly see any active experiences by selecting on Experiences in the navigation bar. Once landing on this page, they'll see the experience image, the experience name, and the time frame the experience will take place. If there is more than one active experience, they will all display on this page. Collectors can select on this to be taken to the Experience Information Page
Experience Icon
Once an experience has been successfully set up, collectors will see an icon in the marketplace indicating an experience is available for the chosen listing(s). The experience icon is distinct from the Rewards Icon.
Alternatively, if a collector has already purchased a listing with an experience, the collector can view it on their Account page (e.g."https://mydomain.com/myaccount#collection").
The same icon from the main marketplace also surfaces in this location.
Experience Icon (R) Indicating this Listing has an Experience Associated with It
Experience Preview on Listings
In either instance, the collector can select into the listing to be taken to the listing detail page where a preview of the experience can be seen.
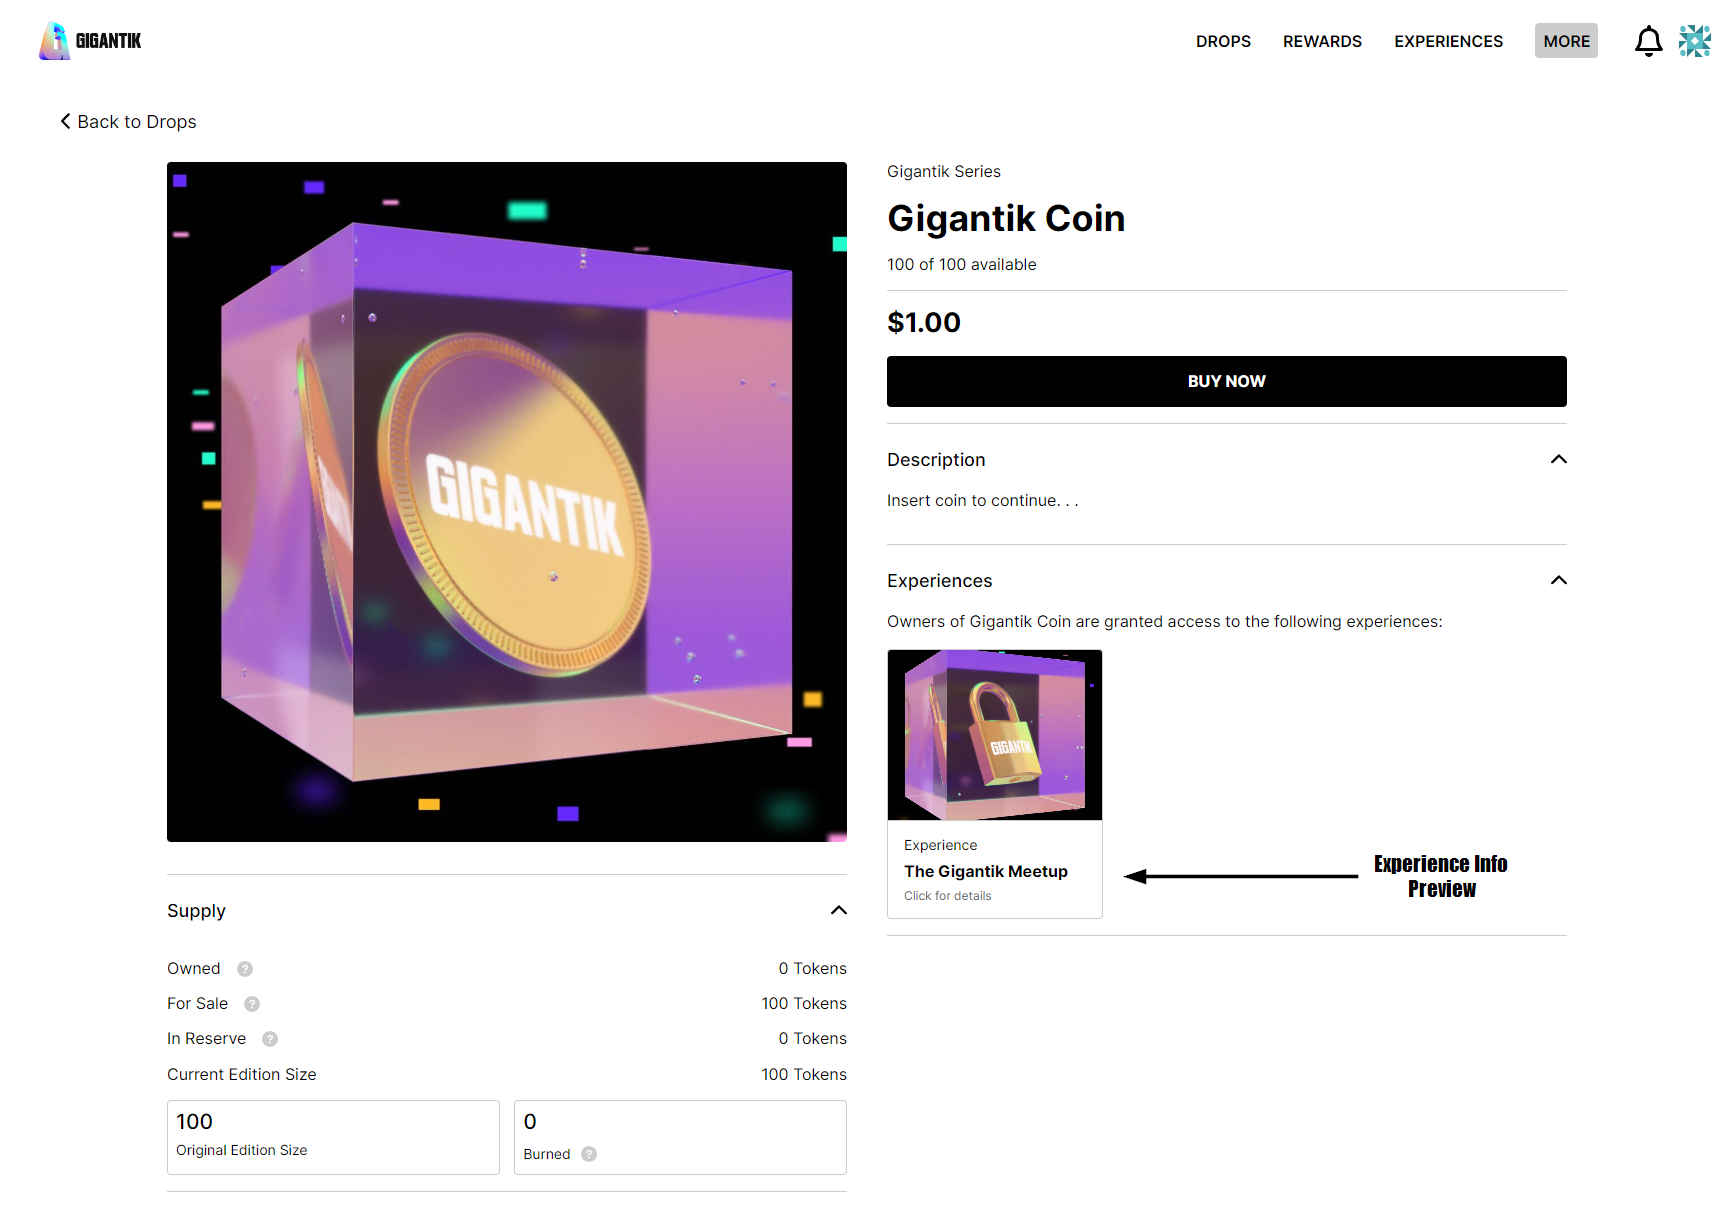
Experience Preview on the Listing Page
Experience Information Page
From the listing detail page, the collector can then select on the experience preview to be taken to the experience information page.

Example Experience Details
On this page, the collector will see the data that was entered during set up, as well as any qualifying listings for the experience. If there is more than one listing associated with the experience, they will all display on this page.
User Proceeds to Add Pass to Mobile Wallet
After purchasing or receiving a listing with an experience, collectors have two methods to add the mobile pass to their Apple or Google wallet.
Method 1 - Navigate through Experiences Tab
- The collector goes to their Experiences tab on their Account page (e.g. "https://mydomain.com/myaccount#experiences")
- The collector Selects Add to Wallet.
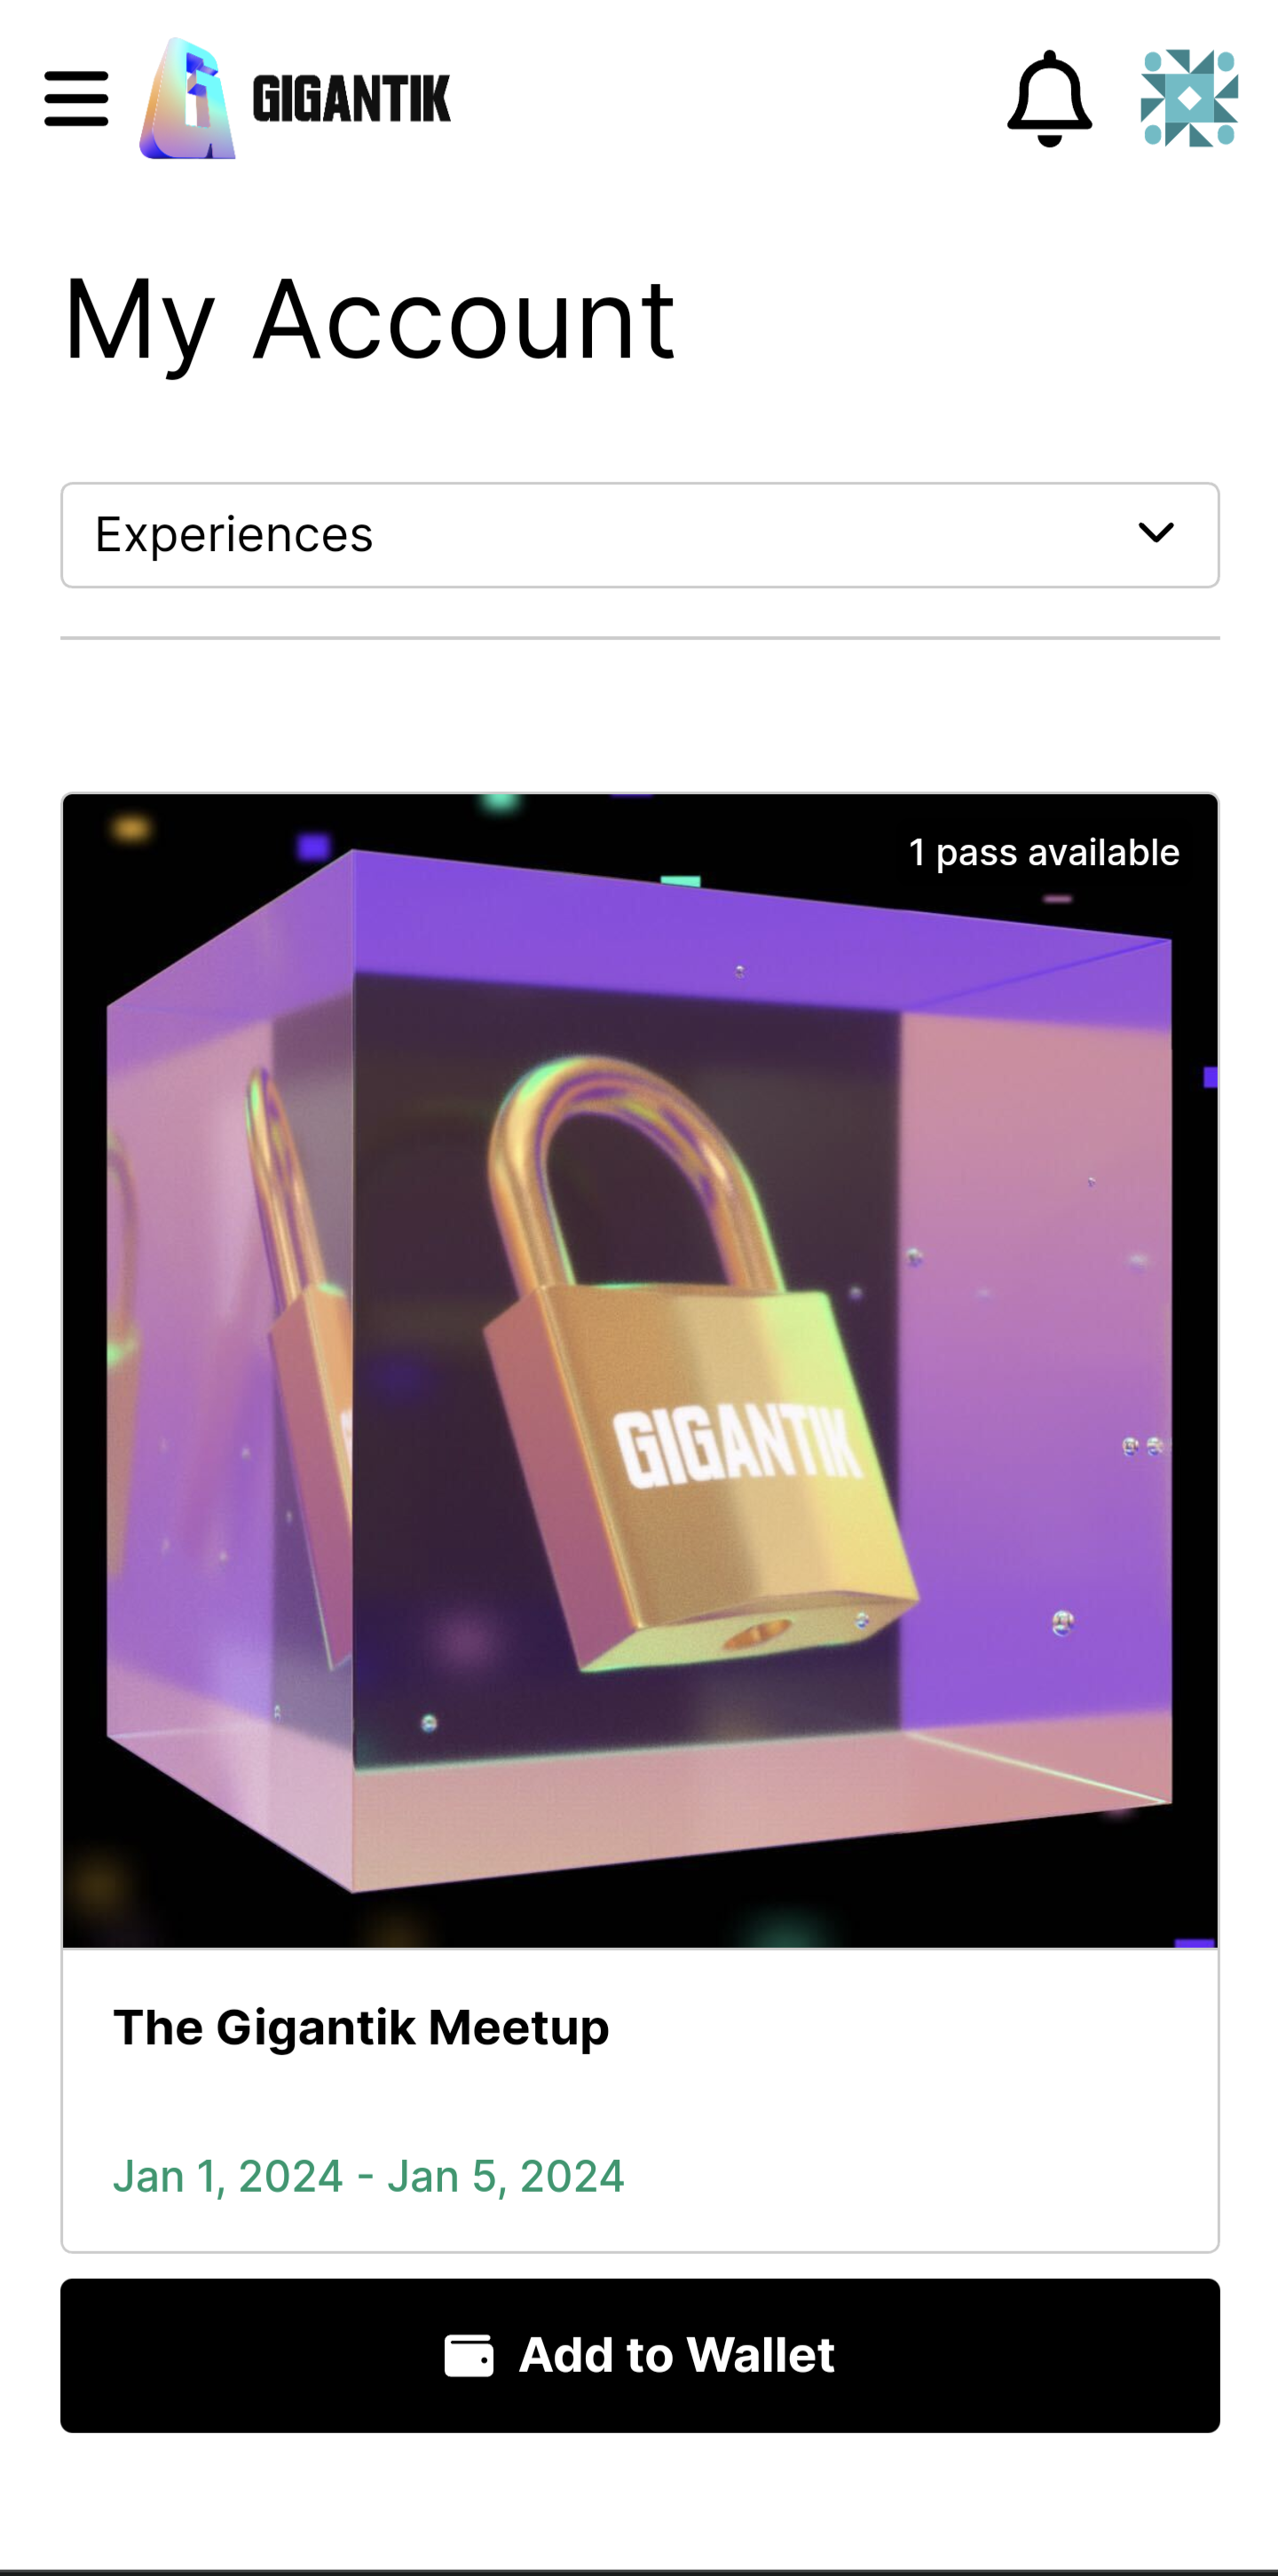
Mobile View of Collector's Experiences Tab
Once selecting Add to Wallet, collectors will be presented with the option to add the pass to either the Apple or Google Wallet.
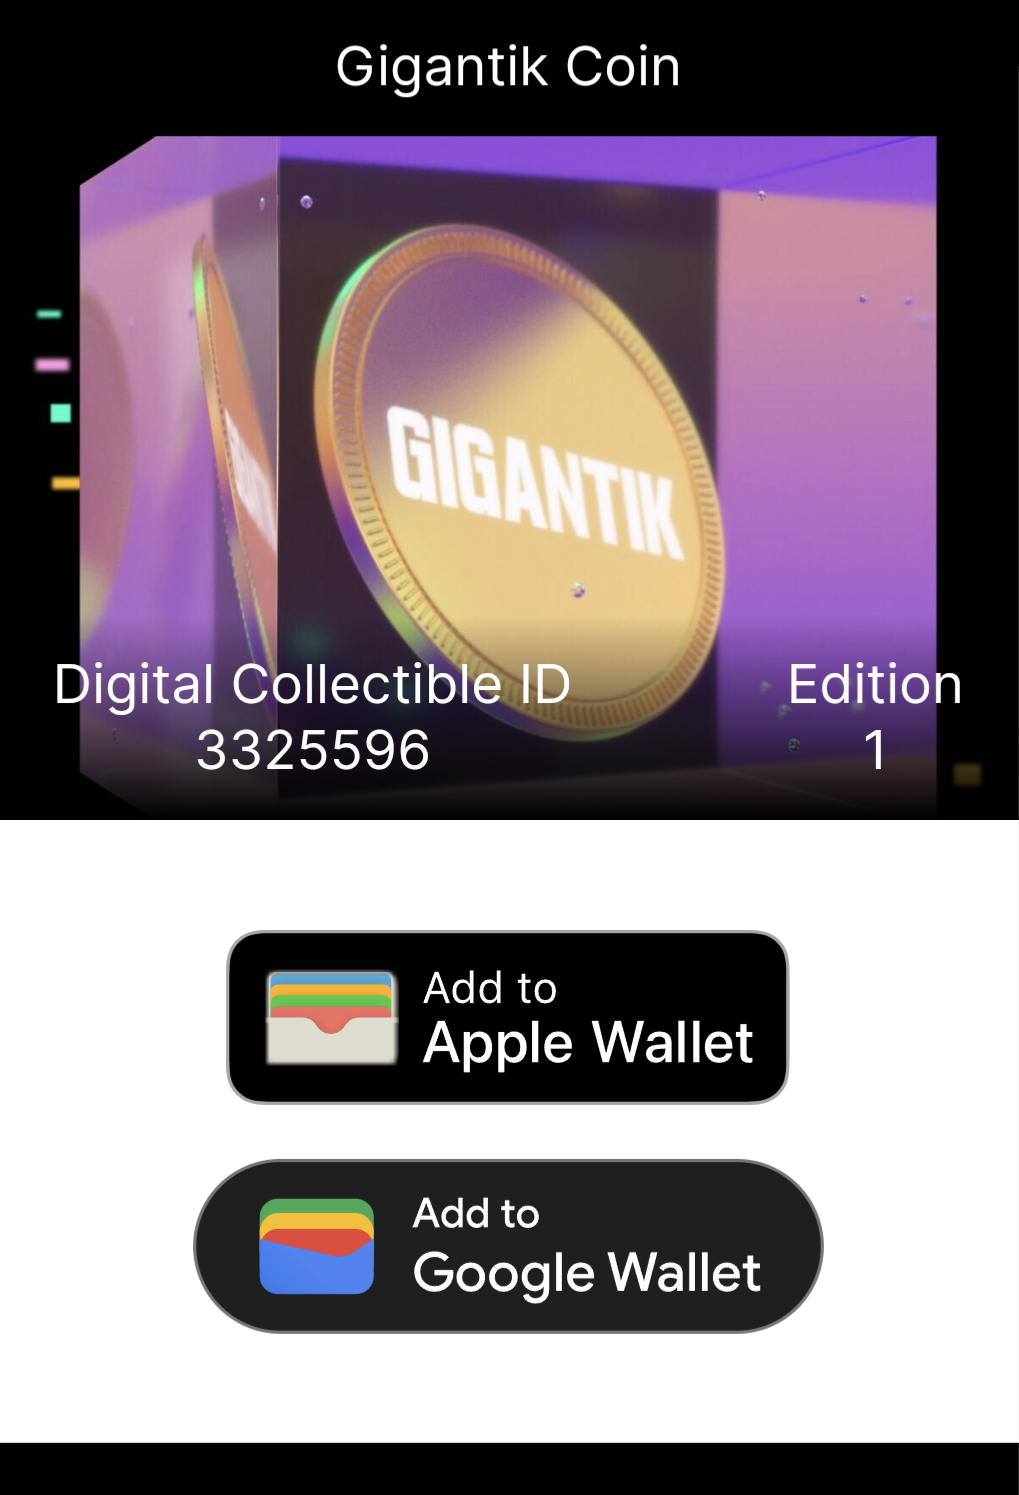
Collector's View after Selecting Add to Wallet
Method 2 - Navigate through Owned Collectibles
- The collector goes to their Account page (e.g."https://mydomain.com/myaccount")
- The collector Selects into the owned collectible with the experience
- The collector Selects Add to Wallet for their respective wallet.
- Collectors can Selects See all options to display any missing wallet type.
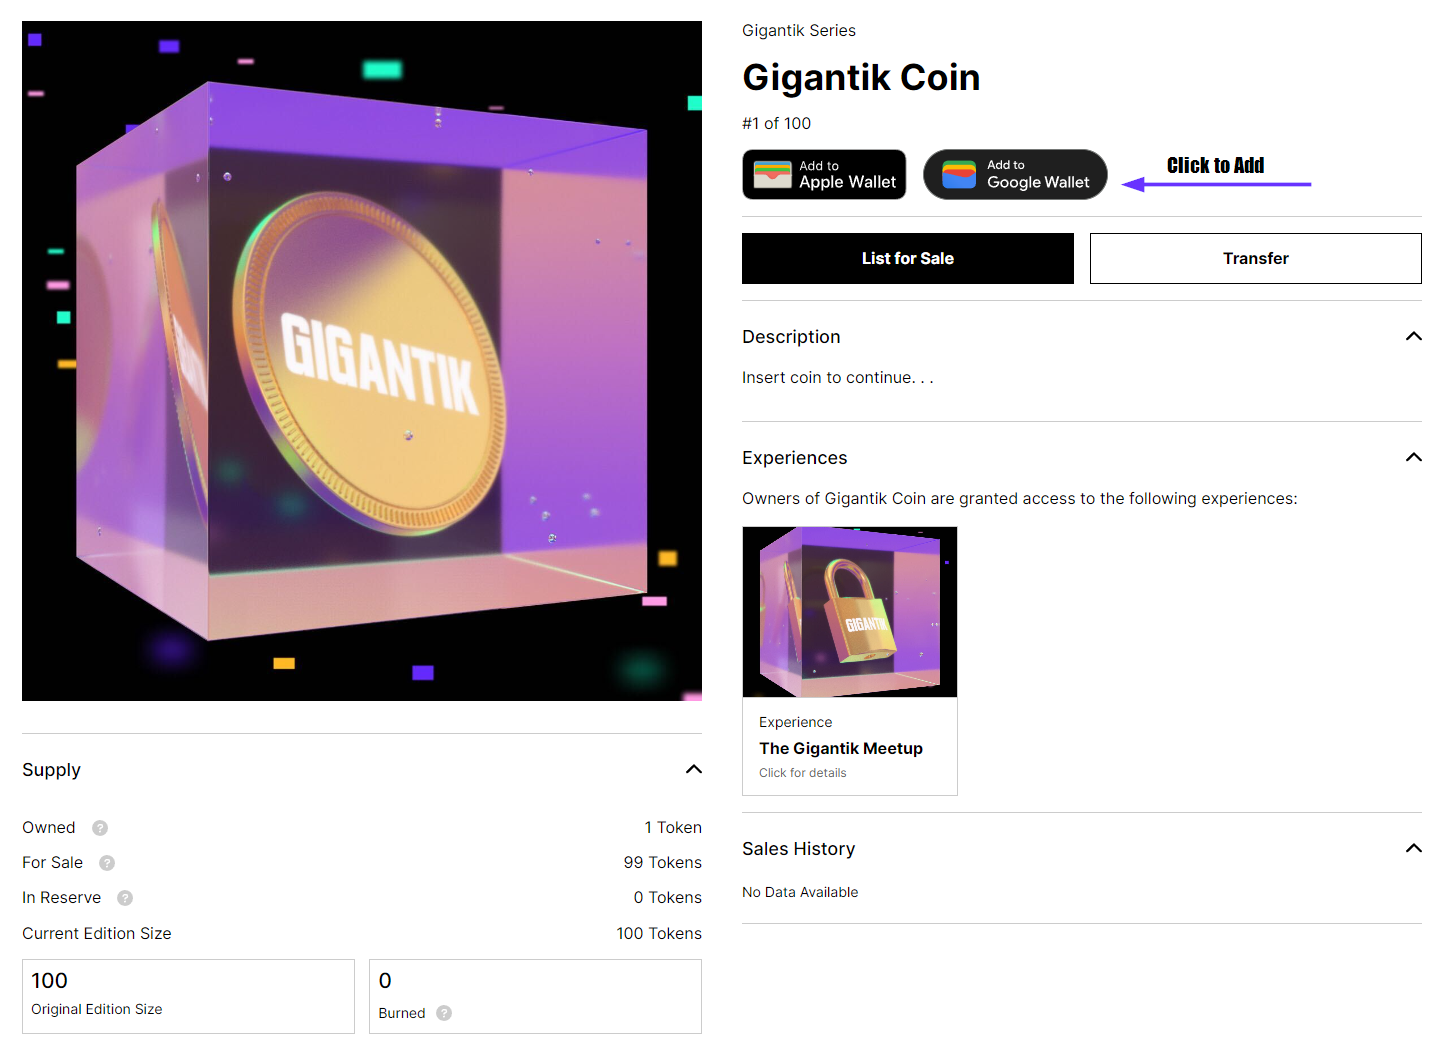
Adding the Pass from an Owned Collectible
Note
Depending on their operating system, the available "Add to Wallet" button will automatically default to either their Apple wallet (MacOS, iOS, iPadOS) or Google wallet (Android, Windows)
At the IRL Event
Once at the event, collectors can present their pass from their wallet which should then be scanned
Updated 10 months ago