
Experiences
Restrict access to real-life experiences based on ownership of certain listings or series

Overview
With Experiences, you can provide collectors with exclusive access to real-life events and experiences.
How it Works
We use our own proprietary scanning app in conjunction with the experience utility to set up the token gating solution for your real-life event. Gating a real-life experience requires the following steps:
- The CMS Admin enables Experiences
- The CMS Admin reaches out to Support to provide images for the pass
- The CMS Admin sets up the experience inside the CMS.
- The tokens selected for the experience will automatically gain a special icon on them, notifying the user an experience is available for the listings or series.
- Holders of the token can then add the pass to their Apple or Google wallet.
- Lastly, you'll use the link set up in the experience to verify the attendee's QR code to authenticate the token required for access at the event.
Step 1: Reach out to Gigantik Support with Pass Icons
Three separate images need to be provided in order to set up the look of the pass. These icons should match your platform branding to maintain consistency. Please send the three images in the format listed below to [email protected]. These images only need to be provided once.
| Image Name | Format | Size (Pixels) |
|---|---|---|
| google_pass_icon | PNG | 100 x 100 |
| apple_pass_icon | PNG | 100 x 100 |
| apple_pass_logo | PNG | 160 x 32 |
Note
It's possible to use the image minted for a listing as the background image for Apple Wallet pass. Simply select the option under Advanced Settings in the individual listing.
Step 2: Set up the Experience
- Go to Utility > Experiences and click the Create New button.
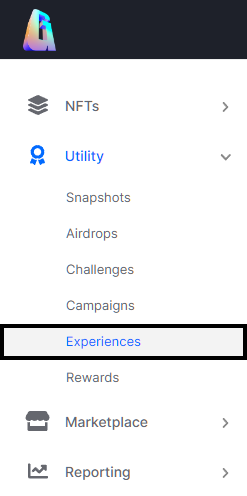
The Experiences Utility Location in the CMS
- Enter an Experience Name - This will surface on the required listing pages as well as inside the Scanner URL.
- Upload an image to represent the experience. This will surface on the required listings pages as well as the experience information page.
- Enter the location your real-life experience will take place.
- Enter a description of your experience. This description will also surface on the experience information page.
- Set the frequency for the experience based on the event schedule.
- Enter the Start Date and End Date for your experience. If you don’t want to set an End Date, Choose This experience has no start or end date.
- Select the individual listings or series you'd like the owners to have in order to get access to the experience
- Additionally, set the number of scans that will be allowed per listing, or choose unlimited for no limit.
- Click Create Experience > Create.
Note:
You must choose either series or listings and cannot select both simultaneously. If you try to switch between the two, a warning message will be displayed.
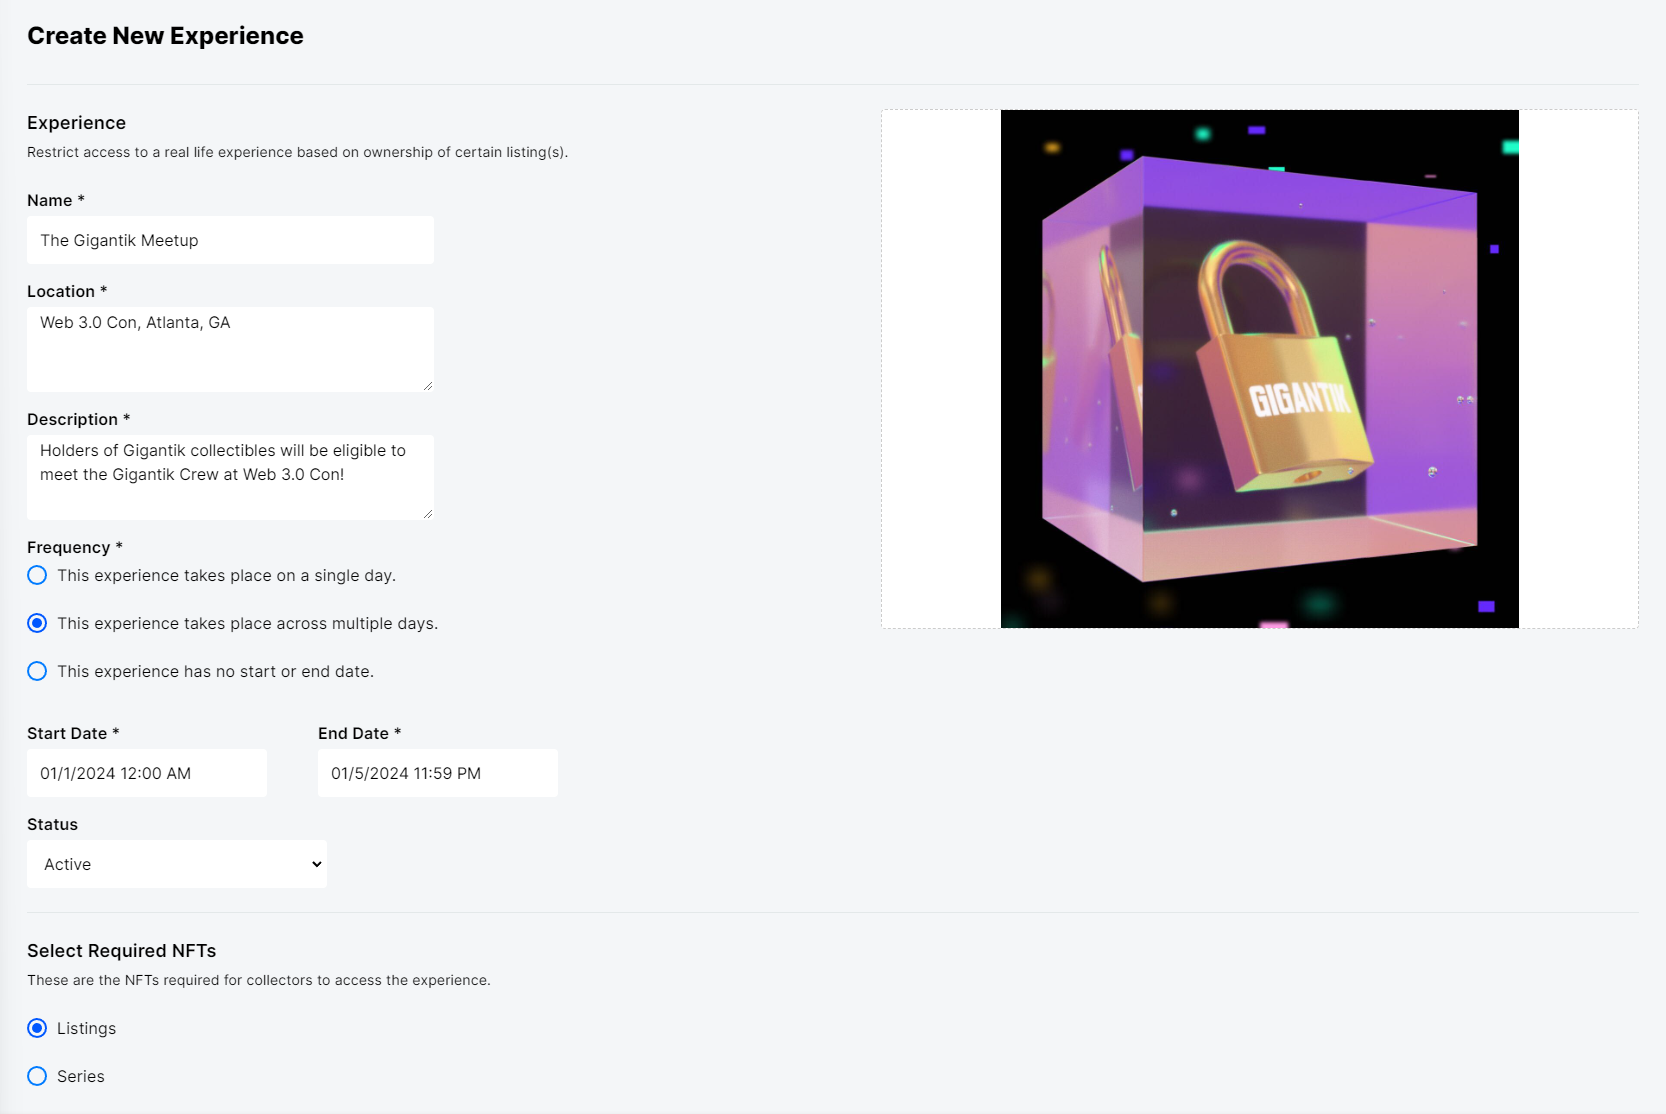
An Example Experience
Step 3: Scan the Pass at the Event
At the top right of the page in the experience that was created, you'll see the URL for the scanner app. Keep in mind, this URL will be unique per Experience.
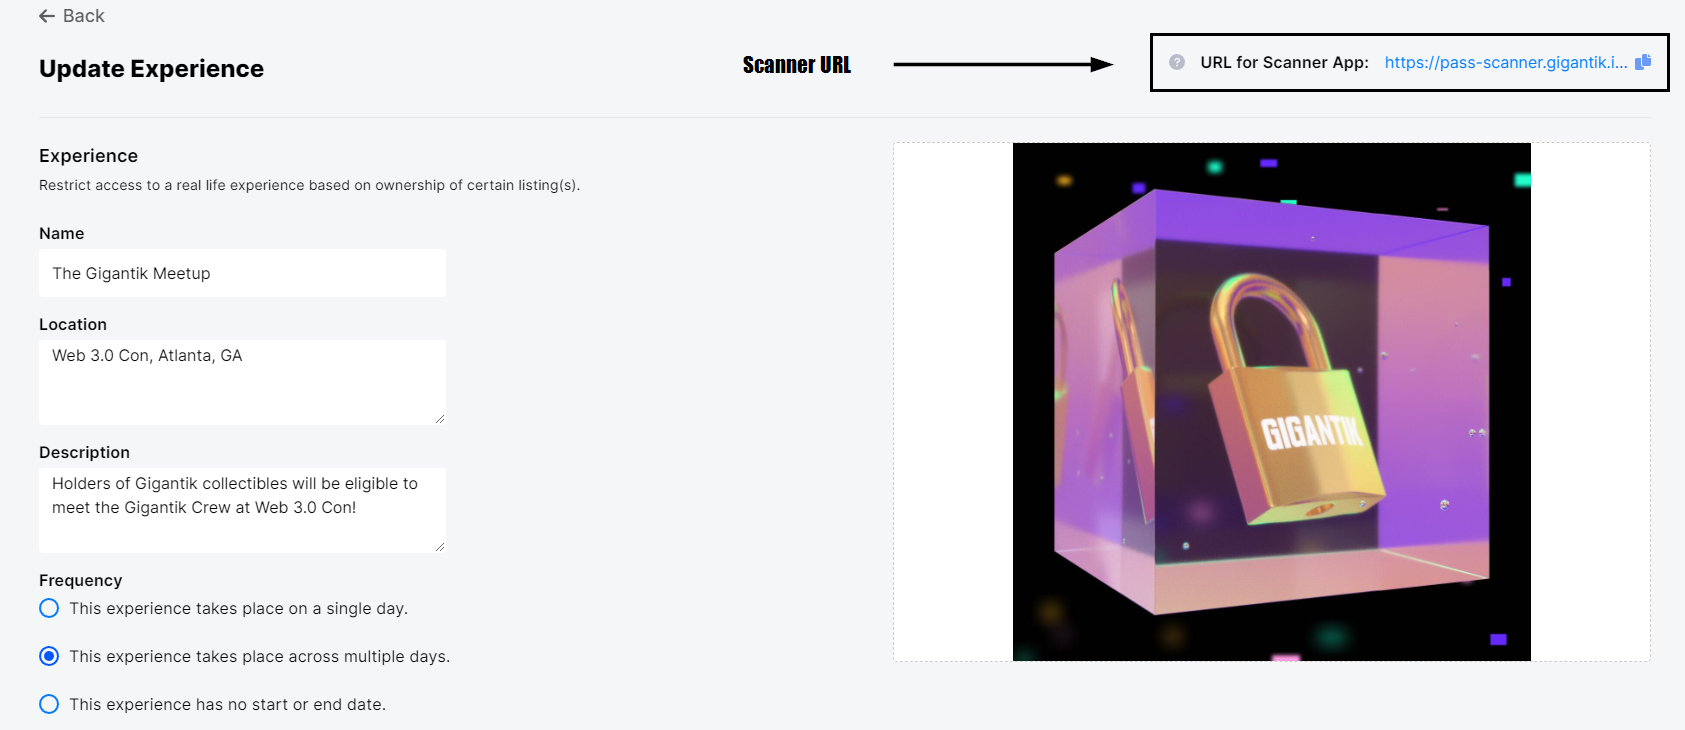
The Scanner URL needed to Scan passes
Open this URL on your personal mobile device. You'll see the name of the experience as well as the Start/End time, if applicable.
Proceed to scan the passes presented by the collectors at the event.
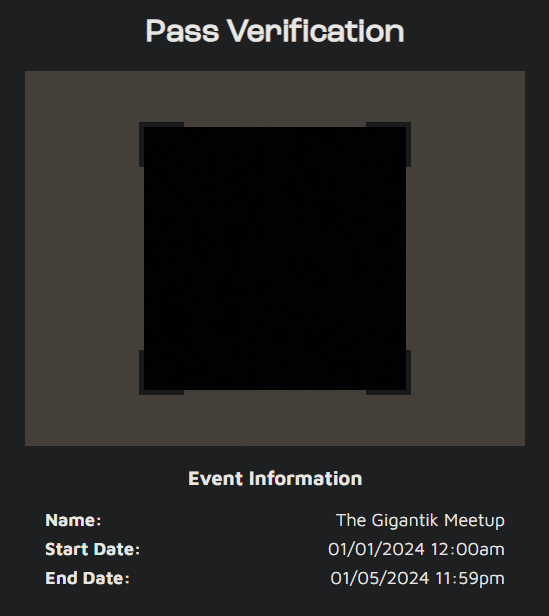
The Pass Verification on a Mobile Device
If their token is valid, you'll receive a green "Valid Ticket" prompt, otherwise, you'll receive a red prompt stating their pass is not valid to get into the event.

A Successful Scan (L) and a Failed Scan (R)
Updated 10 months ago